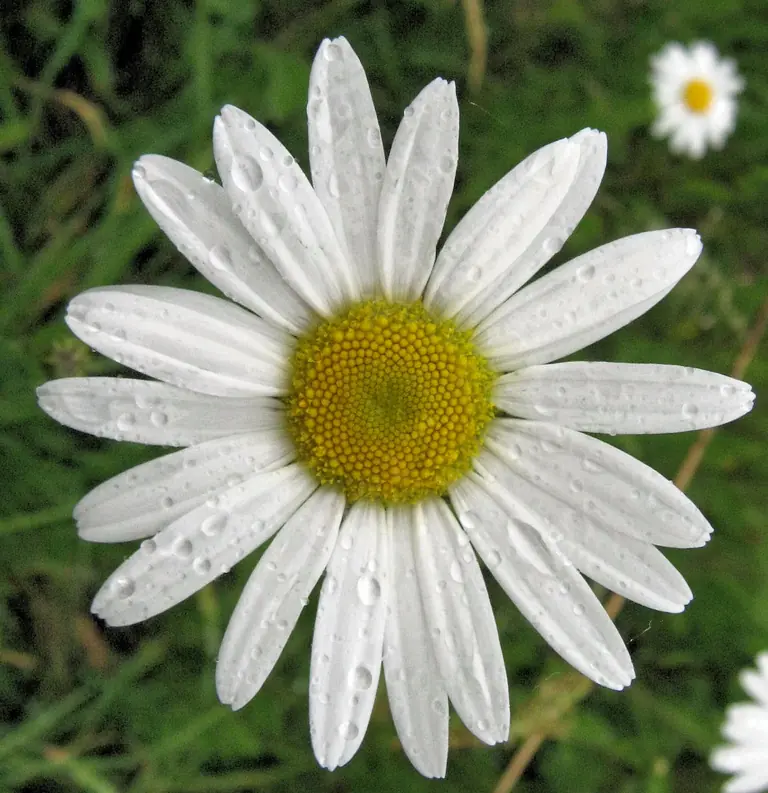
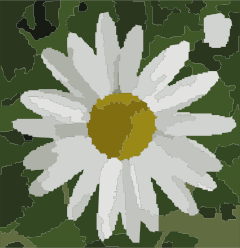
Start with a clear subject, or try the sample to explore the studio.
02
Make it your own
Set the board size, simplify pieces, and choose your fabric colors.
03
Print & start making
Download your kit. Print at actual size and check the ruler before cutting.
A THOUGHTFUL PLAN FOR EVERY PIECE
How the Kinusaiga Pattern Maker Works
From pixels to fabric shapes
The generator groups your photo into colored regions, then traces their boundaries. Complexity and background settings influence those shapes. Broad, distinct areas of color make a clearer starting point than fine texture. Review the result against your photo before editing.
One pattern, every view
The color reference, groove drawing, numbered pattern, cutting templates, and fabric list all come from the same editable pattern. Change a color or merge neighboring pieces, and your kit follows. C numbers identify fabric colors; plain numbers identify individual pieces.
Made to fit your board
Set the finished dimensions in centimeters or inches. Cutting allowance adds fabric for tucking without moving the groove lines. Large PDF patterns tile across A4 or US Letter sheets. Print at actual size and check the calibration ruler before assembling your pattern.
PLAN THE PICTURE BEFORE CUTTING FABRIC
What Is Kinusaiga?
Kinusaiga turns a picture into a composition of fabric pieces tucked into grooves in a base board. A Kinusaiga pattern is the plan for those pieces: where each boundary runs, which fabric color belongs inside it, and how large the finished picture should be. Unlike a simple photo outline, a useful template also helps you keep track of individual sections while cutting and assembling.
This free online Kinusaiga pattern maker converts a photograph into editable regions. Use it to prepare a color reference, groove drawing, numbered drawing, cutting templates, and fabric list. The result is a starting point for your Kinusaiga project. Automatic shapes still need inspection: a small eye, narrow stem, or sharp corner may be difficult to reproduce in your chosen fabric and board.
Customize Your Kinusaiga Pattern
Simplify Small Sections
Begin with Simple complexity for broader Kinusaiga shapes. After generation, select a region, choose Merge neighbor, and select a piece sharing an edge. Corner contact alone is insufficient. Merge small fragments when the combined outline still describes your subject. Undo and Redo let you compare edits. Background simplification can still create fragments; it does not guarantee fewer sections.
Number Each Section
The Numbered view assigns each Kinusaiga piece its own plain number so you can match an outline to its cutting template. These piece numbers serve a different purpose from the C-prefixed color numbers in Color view. Several separate pieces may use C1 while each keeps its own individual piece number. Check both Kinusaiga views before exporting.
Use the Color Guide
The Kinusaiga palette links each C number to a color swatch and the fabric list. Select a piece to change only its color, or replace a palette swatch to update every region using that color. Choose actual fabrics by comparing them with the reference under your working light. Screen colors cannot guarantee an exact fabric match.
Preview Colors
Try different flat colors on your Kinusaiga pattern online before cutting fabric. The preview shows solid fills, not woven texture, fabric prints, stretch, or lighting. It helps compare contrast and color placement. For a pet Kinusaiga portrait, preserve the contrast around eyes and muzzle; see the photo-to-pattern tutorial for subject-specific checks.
Cutting allowance adds extra fabric around the Kinusaiga piece boundaries for tucking. Internal and outer edges have separate settings; these do not move the groove lines or change the board size. Start with the suggested allowances, then test a scrap using your materials. Inspect making-check warnings and narrow pieces rather than treating automatic Kinusaiga output as a tested physical template.
Resize and Print Your Kinusaiga Pattern
Set Your Board Size
Enter width and height in centimeters or inches to resize your Kinusaiga pattern. Keep original proportions enabled to preserve the picture shape; unlocking them stretches the image. Each dimension must be between 2 and 200 cm. After changing an existing project, select Apply size to this pattern before exporting. The 24 in wide preset sets the width; with proportions locked, height follows the current aspect ratio.
A larger Kinusaiga board makes the same sections physically larger. A smaller board can make previously comfortable pieces too narrow. Resizing is therefore also a reason to inspect your Kinusaiga outlines again. The assembly preview shows page coverage and sheet counts, not a life-size screen image.
Print Across Multiple Pages
To print a Kinusaiga pattern on multiple pages, select A4 or US Letter, choose portrait or landscape, and set the printer margin and tile overlap. Match the margin to your printer’s printable area. Overlap repeats part of the artwork across adjacent sheets. Choose the full kit, groove pattern only, or numbered pattern only; the sheet count changes with the selected layers and optional assembly guides.
Download the Kinusaiga PDF, open it in a PDF viewer, and print at 100% or Actual size with Fit and Shrink disabled. Printing this webpage through the browser does not produce the tiled kit. Print one tile first and measure its 100 mm ruler. If the measurement is wrong, correct the viewer or printer settings before continuing.
Arrange the Kinusaiga sheets by row and column labels. Trim blank top or left margins where needed, align repeated artwork and registration marks, and tape the backs. Keep the groove drawing separate from the cutting templates, which include allowance. SVG and PNG downloads contain all five kit layers; PDF layer selection does not change those ZIP exports. Physical scale and paper alignment still require your own print check.
BEFORE YOU BEGIN
Kinusaiga Pattern Maker FAQ
Is the Kinusaiga pattern maker free?+
Yes. Kinusaiga generation, editing, and downloads require no payment or account. Processing limits can temporarily pause new generation. A loaded or restored project remains available for local editing and exports even when the generation service is unavailable.
Which photos work best for Kinusaiga?+
Choose a sharp subject with clear color boundaries and a simple background. Fine fur, faces, overlapping branches, and complex illustrations may lose important details. Try Simple first and inspect the Kinusaiga result against the original. Choose another photo if essential features disappear.
Can I resize a Kinusaiga pattern after generation?+
Yes. Change the finished size, apply it to the current pattern, and review the outlines before downloading again. Changing the Kinusaiga board dimensions changes physical piece sizes; changing cutting allowance only adds fabric around those pieces.
How do I print a large Kinusaiga pattern at home?+
Use the tiled PDF with your actual paper size, margin, and overlap settings. Check the sheet count, print at Actual size, and measure the calibration ruler before assembling. The Kinusaiga PDF carries row and column labels for matching neighboring pages.
Are my photos uploaded or stored?+
Generation sends your photo and settings to the processing service temporarily. Upload files are closed after processing; photos are not permanently stored there or used for training. Editable Kinusaiga projects and their available source photos are saved in this browser. A downloaded project can contain the original photo. Read the privacy details before sharing it.
Does the Kinusaiga fabric list tell me exactly what to buy?+
It estimates fabric area by color. Allow extra for fabric grain, print placement, layout waste, and mistakes. The Kinusaiga color preview and quantity list support planning; test the materials and allowance on a small piece before cutting your full project.